Monday 28 October 2013

#Sharing About Photosynthesis (Light reactions)


 Embed Video: Photosynthesis (Light reactions)

Hello everyone!
I would like to share a video about Photosynthesis (Light reactions).

             
             Photosynthesis is the means by which plants make use of chlorophyll and light to produce energy. This section gives an overview of the the basic stages in the light reactions of the photosynthetic electron transport chain.

          This video use structured inquiry theory. Structured inquiry is a guided inquiry mainly directed by the video. Typically, this results in a cookbook lesson in which students follow video directions to come up with a specific end point or product. Sometimes this approach is appropriate to use in the classroom; however, student engagement in the task is limited to following video instructions. Simply following directions in a cookbook manner does not actively engage students’ minds. 


 Advantage : 
    1. The simulation used to show the Photosynthesis (Light reactions) is interesting and easy to understand.
    2. Use simple English.
    3. The flow of the lesson is very smooth.
    4. The lesson is related to daily life concept about plant.
    5. The voice and sounds are very clear. 

Disadvantage :
    1. This video does not promote open inquiry learning because there have no question to make students think and explore about this knowledge.

    Wednesday 16 October 2013

    #5 Wacom : Digital Drawing Tablet

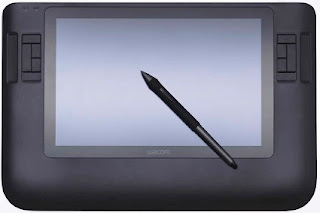
    Haii...! Okay untuk minggu ni Prof. Zaida telah memberi kami wacom drawing tablet sorang satu untuk memudahkan proses kami melukis di dalam adobe flash ini. Haaa...ni la dia rupa WACOM digital drawing tablet tu....

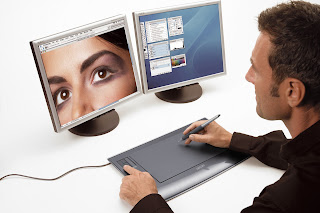
    Aplikasi Penggunaan Digital Drawing Tablet

    Zoom in Digital Drawing Tablet

    Maka, pada minggu ini kami pun mula belajar dan menyesuaikan diri melukis dengan menggunakan WACOM ini. Pada yang tidak mahir dan tidak pernah menggunakan WACOM seperti saya ini agak sukar ye untuk melukis menggunakan WACOM ni. hehe.Tapi, bak kata orang "practices makes perfect". Jadi saya perlu banyak praktis lagi untuk menjadikan lukisan saya lebih cantik dan sempurna.

    Untuk minggu ke-5 ni juga kami mula belajar untuk apps 3 dan 4 di dalam Ipad yang diberi. Kami diberi tugasan atau aktiviti untuk dilakukan didalam kelas dengan menggunakan apps 3 tersebut. Berikut merupakan hasil tugasan yang saya lakukan berserta langkah-langkahnya sekali :)


    Task 1 : Motion tweening


    Steps :
    1. Draw a circle. double click it to make sure the shape and the stroke is together.
    2. Go to frame 25 and insert keyframe. Drag the circle to the place that u want to move it.Resize the circle if u want. You also can change the alpha, brightness and many more to change the color of the circle.
    3. Repeat step 2 according to the number of times you want to move the circle.
    4. Go to any frame between 1 to 25; for example  12, then right click and select create motion tweet. Repeat this step at every range of frame that you have done.
    5. Next, click control on the menu bar and select test movie to view your animation.
    6. Finally, you can save your animation.


    Task 2 : Shape tweening

    Steps:
    1.Type the text you want using text tool.
    2. Go to modify and then click break apart.
    3. Repeat step 2.
    4. Go to frame 25 and insert keyframe.
    5. Delete the text.
    6. Draw the star using polystar tool. Double click at it to make sure the shape and the stroke are together.
    7.Go to the center between frame 1 until 25, for example frame 12; then go to properties and click tween and change it to shape.
    8. Next, click control on the menu bar and select test movie to view your animation.
    9. Finally, you can save your animation.


    Task 3 : Motion guided


    Steps:
    1. Draw the ant.
    2. Convert the ant to movie clip.
    3. Choose a key frame (example: keyframe no.50)
    4. Place the and at the new position at keyframe 50.
    5. Right click between the keyframe and create motion tween.
    6. Rename the layer as ant.
    7. Create motion guide.
    8. Use pencil to draw the guide
    9. Select first key frame and click the ant at the cente and move it at the starting point of the guide.
    10. For the last key frame, move it at the last point of the guide.
    11. Use transform tool to adjust the position for certain keyframe,
    12. Tick the orient to path at the first key frame.
    13. Test movie.


    Task 4 : Frame by frame

    Steps:
    1. Design the cartoon (same cartoon) with different expression..
    2.Save every image in the library by convert it to symbol.
    3.Put the first image in keyframe 1..
    4.For next keyframe which are keyframe 2 and so on, insert another image.
    5. Test movie.
    6. Save.

    Okay..rasanya itu sahaja yang ingin saya kongsikan untuk minggu ini. Sambung minggu depan pulak ye. Hehe :)

    #4 Class di Facebook

    Helloo...!! Hah..utk minggu ni class authoring xde. Jadi kami ber'class' di Facebook. Hehe  :) Untuk tugasan seterusnya, kami perlu membuat aktiviti 2. Kami juga perlu meng'explore' serta menggunakan onion skin tool dan menukarkannya kepada graphic symbol. Konsep bagi onion skin tool adalah 'tracing' ataupun menekap.

    Dalam onion skin tool ini kita akan menghasilkan satu grafik dari grafik yang asal dengan mengurangkan opacity untuk frame semasa dan mula menekap pada frame kedua. Gambar dibawah ini merupakan hasil percubaan pertama tracing saya. :)


    Seperti yang ditunjukkan diatas, lukisan grafik yang sebelah kanan merupakan hasil tracing saya manakala yang sebelah kiri merupakan gambar original. Antara tools yang saya gunakan untuk melukis doremon ini adalah line tool, oval tool dan pencil tool. Bagi proses mewarna pula, seperti biasa saya menggunakan paint bucket tool. Oh yaa..utk menekap or 'trace image' doremon ni..ada beberapa langkah. Iaitu :

    1. Import the pic doremon to library.
    2. Insert keyframe dalam frame yg ke-2.
    3. clik onion skin tool. The real doremon will appear dalam keadaan kabur.
    4. To trace the image, use pencil tool and brush tool.
    5. To trace the image closely, we can zoom in and out.
    6. After done trace the image, we remove keyframa dalam frame yg pertama.
    7.We can color the image using paint bucket tool.
    8. Then, clik modify. Select convert to symbol and choose grafik.
    9. Done! :)


    Okay..tugasan ini juga perlu di'upload' di dalam facebook utk dikongsi bersama kawan-kawan yang lain. Sambung minggu depan pulak k. Byeeee! :)

    #3 Apps Flash

    Haiiii..! Hah..minggu ni kami diajar menggunakan ipad yang telah di'install'kan beberapa apps bagi membantu pembelajaran mengenai flash. Untuk minggu ini, kami belajar apps 1 dan 2 dan membuat dua aktiviti yang berkaitan dengan apps tersebut. Bagi apps 1, ia lebih kepada pengenalan kepada interface dalam Adobe Flash. Dibawah ini merupakan interface bagi apps 1 di dalam ipad..


    Seperti yang dapat dilihat dalam gambar di atas, dalam apps 1 kami banyak belajar mengenai interface dalam flash, aplikasi dalam flash serta jenis-jenis interaksi. Dibawah ini pula adalah interface bagi apps 2. Secara umumnya dalam apps 2 ini kami belajar mengenai basic drawing, coloring dan juga drawing button.


    Macam yang saya dah katakan sebelum ini, setiap satu apps ini kami diberikan satu aktiviti. Untuk apps 1, kami diberi aktiviti satu iaitu berkaitan dengan pengenalan berkenaan interface dalam flash. Kami juga perlu menyatakan jenis interaksi yang ada serta fungsinya. Manakala, aktiviti 2 yang berkaitan dengan apps 2, kami telah membuat aktiviti berkaitan dengan drawing. Dalam aktiviti ini, kami perlu melukis mengikut guide gambar yang diberikan serta menjelaskan jenis tool yang kami gunakan dalam melukis dan mewarna. Dibawah ini merupakan gambar yang perlu kami lukis.

    Maka, saya pun mencuba la untuk membuat aktiviti ini.  Dalam aktiviti ini saya menggunakan line tool dan shape tool untuk melukis dan paint bucket tool untuk mewarna. Untuk mendapatkan tone warna, kita boleh mengubah warna tersebut di ruangan 'color'. Dibawah ini merupakan hasil lukisan saya yang tak pandai dalam art ni. hehehe. jangan gelak k? Hihi :p
    Lukisan ini juga perlu diupload di dalam facebook sebagai assignment kami yang pertama. Untuk melukis gambar ni, saya menggunakan beberapa tools. Which are ;

    1. Line tool-use to draw line
    2. Selection tool-use to select an object, create curve line & selection rectangle
    3. Oval shape- use to draw circle (window & door)
    4. Rectangle tool- use to draw house
    5. Free transform tool- use to resize the object
    6. Eraser tool- to erase unwated line and fill of shape
    7. Eyedropper tool- to pick colour out of scene
    8. Paint Bucket tool- to paint the object with gradient fill
    9. Stroke color tool- to change the stroke colour of object
    10. Fill color tool- to change the fill colour's of object
    11. Zoom tool- use to zoom in or out of the stage
    12. Text tool- use to insert static text ("Fatin Deen")


    Okay..itu sahaja tugasan minggu ni. Hehe Btw, next week Prof. Zaida xde. Beliau ada outstation kat budapest, Hungary. Jadi class kami terpaksa di'cancel'kan.huhu Walaubagaimanapun, kami diberi beberapa tugasan yang akan diberikan oleh akak nurul farhana di dalam facebook. :)

    #2 Basic Adobe Flash CS3 Professional

    Sebenarnya aku quite excited nak blaja flash ni sebab tgk mcm best je hasil dari orang yang guna flash. huhu. Orang xde basic la katakan..hehe. So, in this class i will try my best to learn about flash. Dalam kelas minggu ini, kami hanya diperkenalkan dengan adobe flash. Kemudian, Prof. Zaida menyuruh kami untuk mempelajari dengan sendiri sedikit sebanyak tentang flash. Prof. Zaida juga ada menerangkan serba sedikit mengenai sejarah adobe flash yang sebelum ini dipunyai oleh macromedia dan kemudiannya telah dibeli oleh adobe pada tahun 2005.

    This week juga kitorang mula belajar flash. Untuk kali ini, Prof. Zaida telah memberi kami ipad bagi membantu proses pembelajaran kami dalam flash. Setiap pelajar diberi satu ipad. Kemudian, Prof. Zaida memberi kami test untuk mengetahui tahap pengetahuan asas kami mengenai flash. Bagi saya yang tiada basic mengenai flash, memang agak sukar la untuk menjawab soalan-soalan yang diberikan. hehe. Nasib sebelum ini saya ada pengalaman menggunakan adobe photoshop dan ada beberapa tools yang hampir sama function dengan adobe flash. Itu pon sikit2 je lah kan. hehe. So, lepas ni harus belajar lebih lagi pasal flash ni. huhu. Sebelum class tamat, sempat aku bergambar bersama Prof. Zaida dan ipad yang baru dapat. Hehe Rasa seronok sangat class authoring ni. :)

    Bersama Prof. Zaida & ipad. Hehe :)